Alex Chang
posted this
29 October 2024
- Last edited 30 October 2024
An OPAS (Service Report) is a detailed document that captures the configuration and status of all components in your RAID system. Support technicians or field engineers may request this report for diagnosis and troubleshooting.
To generate the Service Report through the WebPAM PROe GUI:
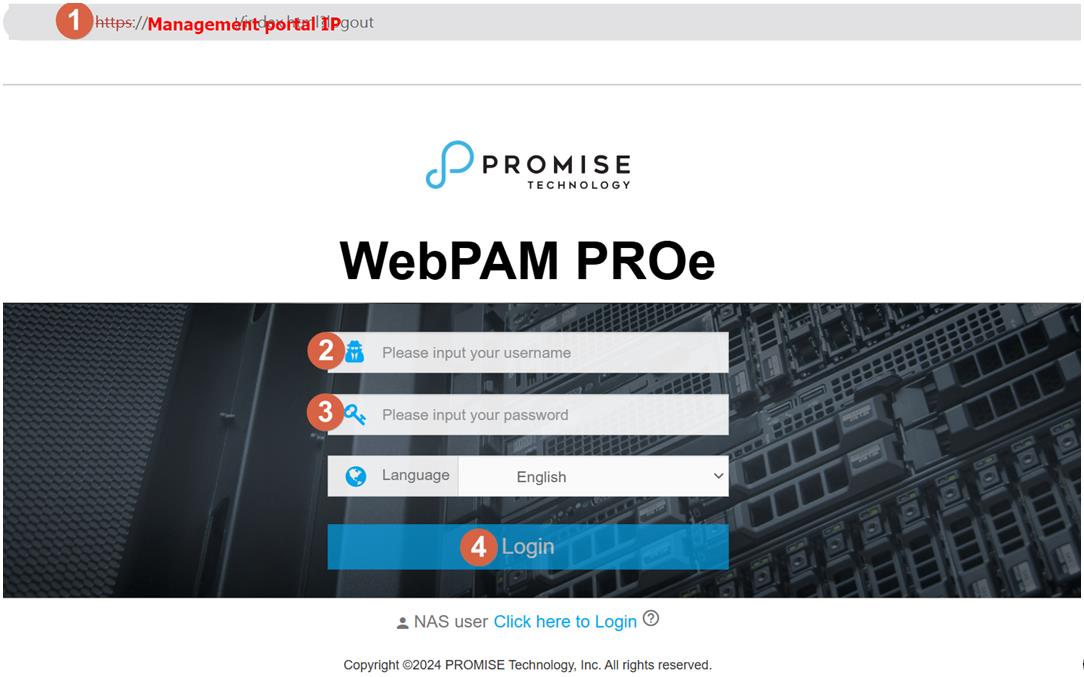
1. Access the Management Portal
- Enter your RAID system’s management IP in your browser.
2. Log In
- Username: administrator
- Password: (default is `password`)
- Click Login.
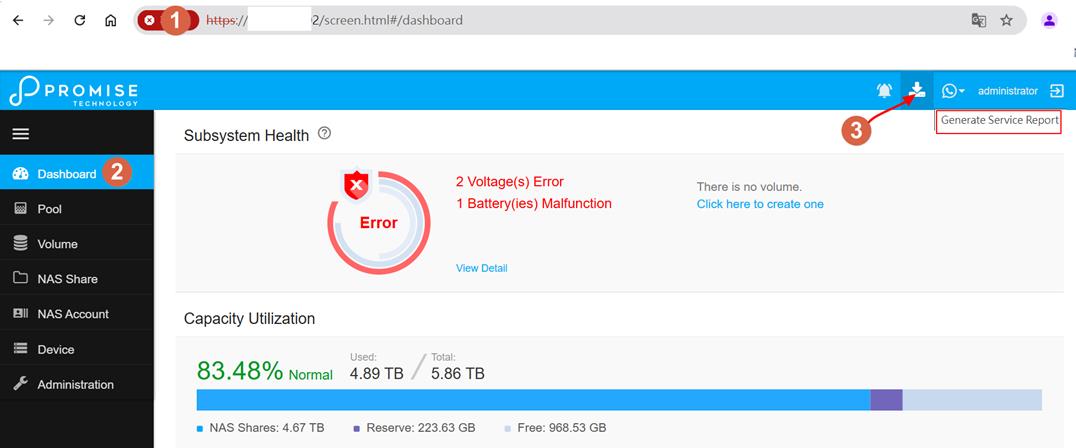
3. Navigate to the Dashboard
- Once logged in, switch to the Dashboard.
4. Generate the Service Report
- Click Generate Service Report in the header at the top of the interface (next to the Events/Alarm icon, which looks like a download icon).
- The system will compile information for the report. This may take a few minutes, depending on the report’s size.
5. Save the Report
- The Vess system generates the report in `.zip` format by default. Depending on your browser settings, you’ll either be prompted to choose a save location, or the file will be saved automatically in your Downloads folder.

Generating a Service Report via USB Flash Drive
Note: Use this method if you don’t know the management portal IP or cannot easily access the GUI
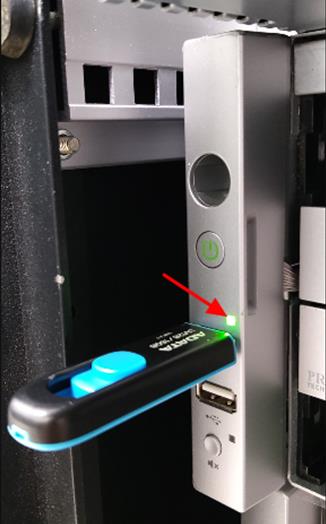
1. Prepare the USB Flash Drive
- Format the USB flash drive to FAT32.
2. Insert the USB Drive
- Insert the USB flash drive into the USB port on the left front side of the unit.
3. Check the LED Indicator
- The USB LED will flash green as the system begins collecting logs.
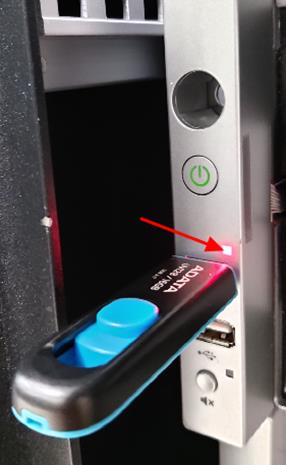
- If the LED flashes red, there has been a failure.Ensure the USB drive is inserted correctly or try another drive formatted to FAT32.
- When the beep sound stops and the LED turns solid green, the log collection has completed successfully.

-If USB is formatted with NTFS , It will fail to collect OPAS and show in red LED
Here is an example of OPAS via a USB flash drive

This links to a Promise KB article on how to attach files to a web support case:
https://kb.promise.com/thread/how-to-attach-files-to-your-web-case/


