How to configure SANLink3 T1 in Windows
To manage configuration settings for SANLink3 T1, use the Windows Device Manager. The SANLink3 T1 is a network adapter, so the settings are changed in a similar way as changing settings for any network adapter (NIC) card. Follow the instructions below to change the link speed and other settings.
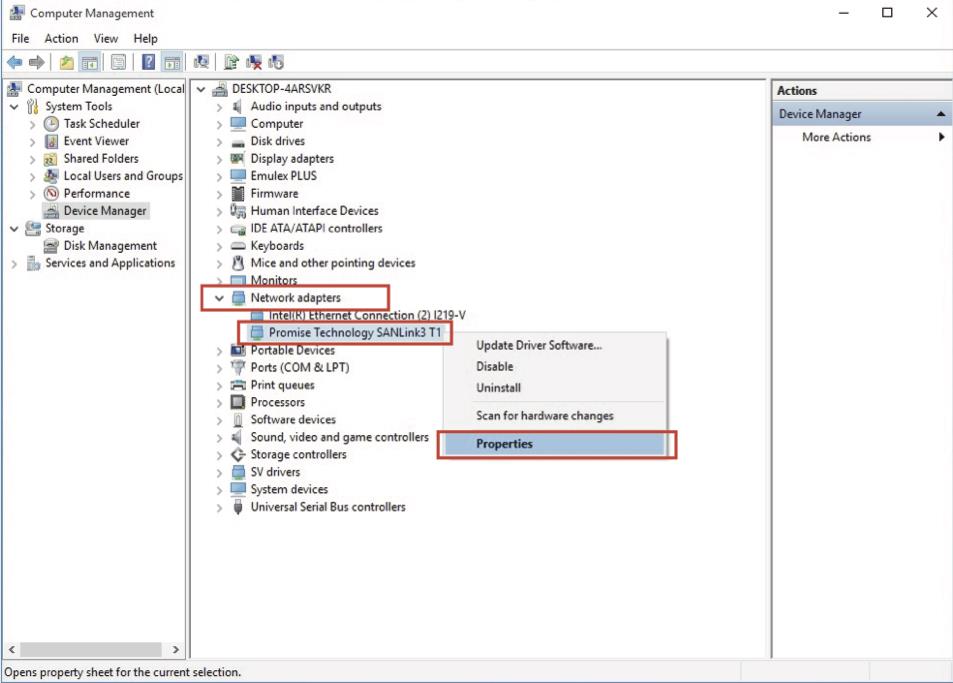
1. On the Windows desktop, right-click on the Computer icon and select the Manage option to open the
Computer Management menu. You can also access the Device Manager in the Control Panel.
2. Click on Device Manager, then expand Network Adapters, locate the SANLink3 T1 adapter, and select the Properties option to open the Properties menu for the adapter. All the configuration settings are accessed using the Properties menu.
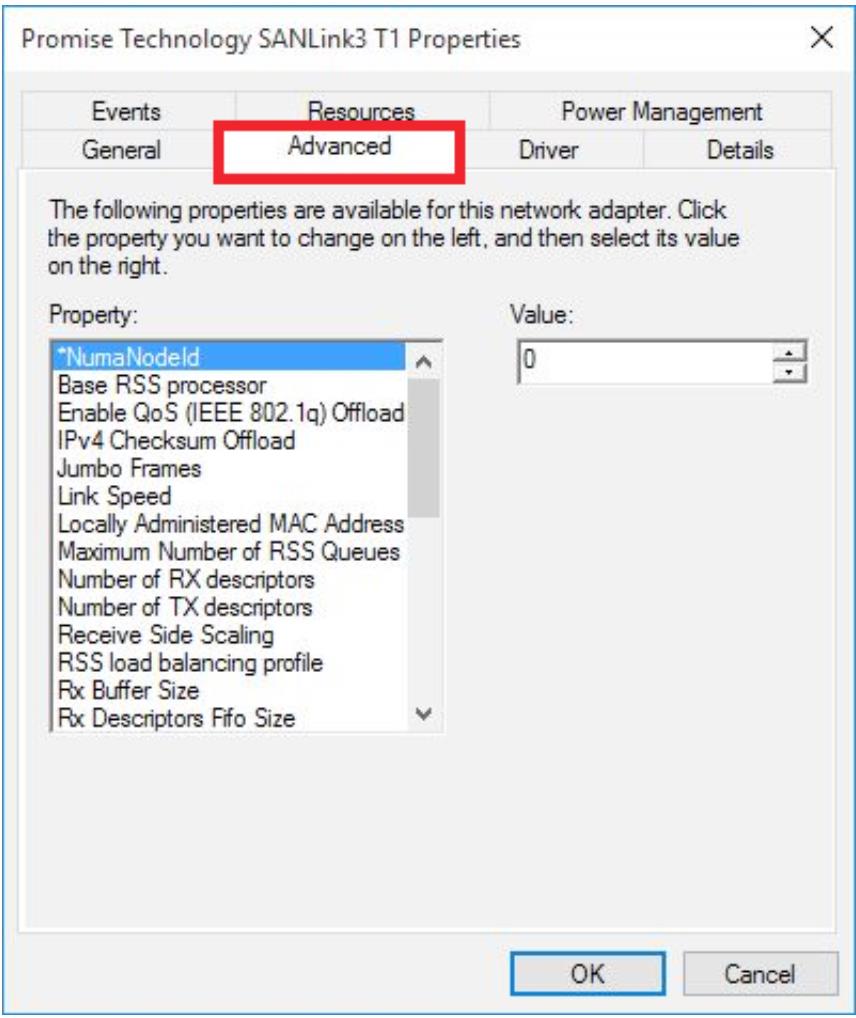
3. Click on the Advanced tab to view all the configuration options the driver supports. Settings that can be configured include Jumbo Frame and Link Speed.
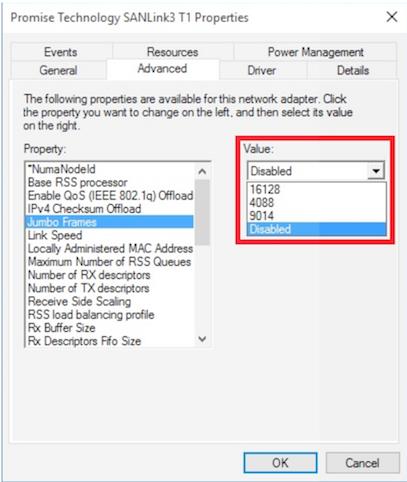
4. To change the Jumbo Frame configuration, click on the Jumbo Frame option and choose the MTU (Maximum Transmission Unit) value from the list that appears. The default Jumbo Frame setting is
Disabled: 1514
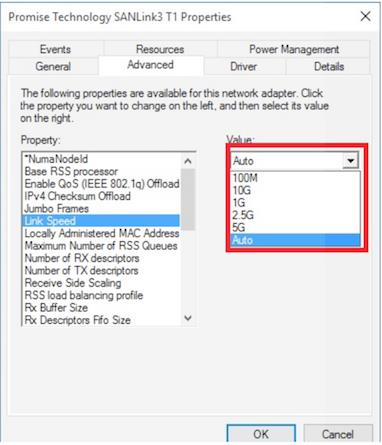
5. To change the Link Speed, select the Link Speed option, then choose the preferred Link Speeed setting from the menu that appears. The default setting is Auto. SANLink3 T1 supports Link Speed values 100M, 1G, 2.5G, 5G, 10G and Automatic.

SANLink3 T1 Network Configuration Guide
- 1.3K Views
- Last Post 09 February 2017
P B
posted this
09 February 2017

