SANLink Workflow Use Cases
Table of Contents
I. Configure SANLink2 or SANLink3 on Mac OS X
II. SANLink3 T1 Windows Info
III. Configure NAS Reshare with Pegasus2/3 using SANLink2 or SANLink3 T1
IV. Pegasus 2/3 with SANLink2 or SANLink3 T1 Reshare Topology Example
V. Full SAN Topology | FC SANLink2/3 & SL2/SL3T1 NAS Clients
I. Configure SANLink2 or SANLink3 on Mac OS X
1. Connect the SANLink2 or SANLink3 to the Thunderbolt port on the Mac host.
2. Download the latest SANLink driver and utility:
A. SANLink2 Driver 1.8.1
B. SANLink2 Utility for Mac OS X 1.04.0000.08
C. SANLink3 T1 Mac Driver v1.50
3. Once the driver has installed successfully, your Mac OS X host will require a reboot.
4. Once the Mac OS X host has rebooted, you may proceed configuring your SANLink2 device.
5. Go to > System Preferences > Network
6. In the Network Preferences, locate your SANLink2/3 Thunderbolt Network Interfaces.
A. If you're uncertain which port it is, you can verify the interfaces using the Network Utility App.
B. Identify the location for each 10Gb Port by opening Network Utility
Network Utility Location = /System/Library/CoreServices/Applications/Network\ Utility.app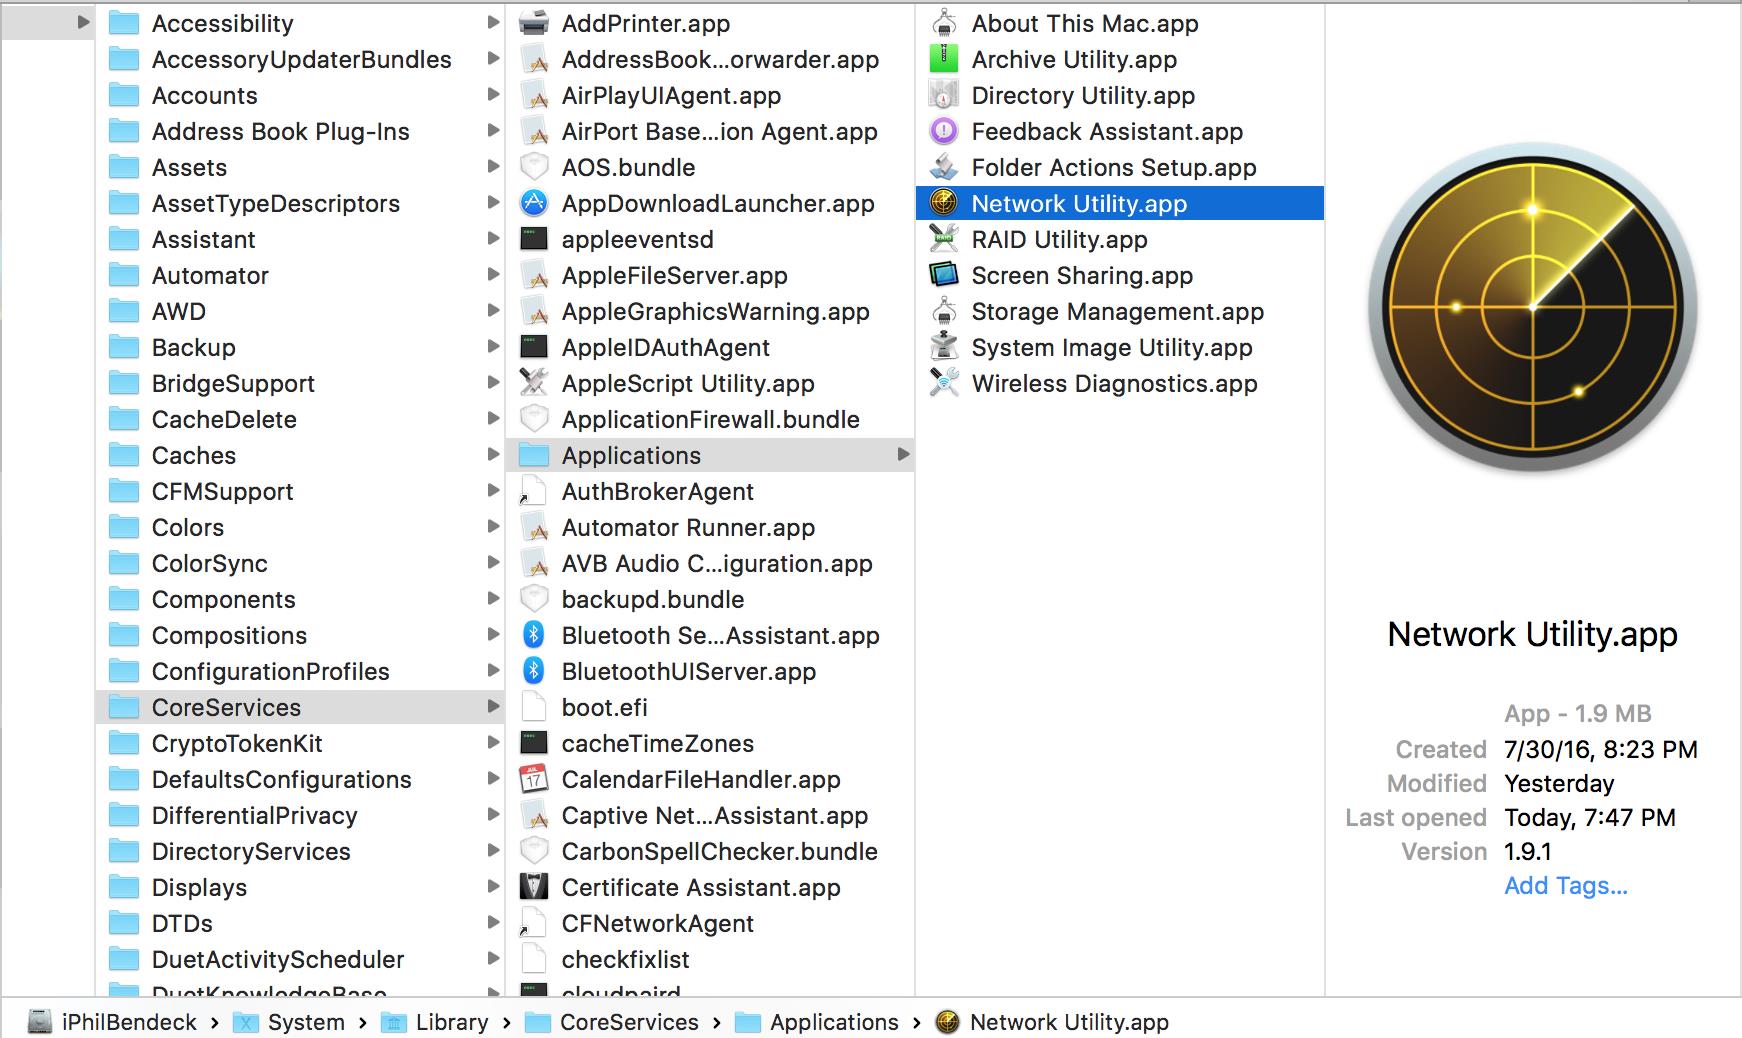
You can also Spotlight Search for it as well.
C. Locate each 10Gb interface location for SANLink2/3:
[SANLink2]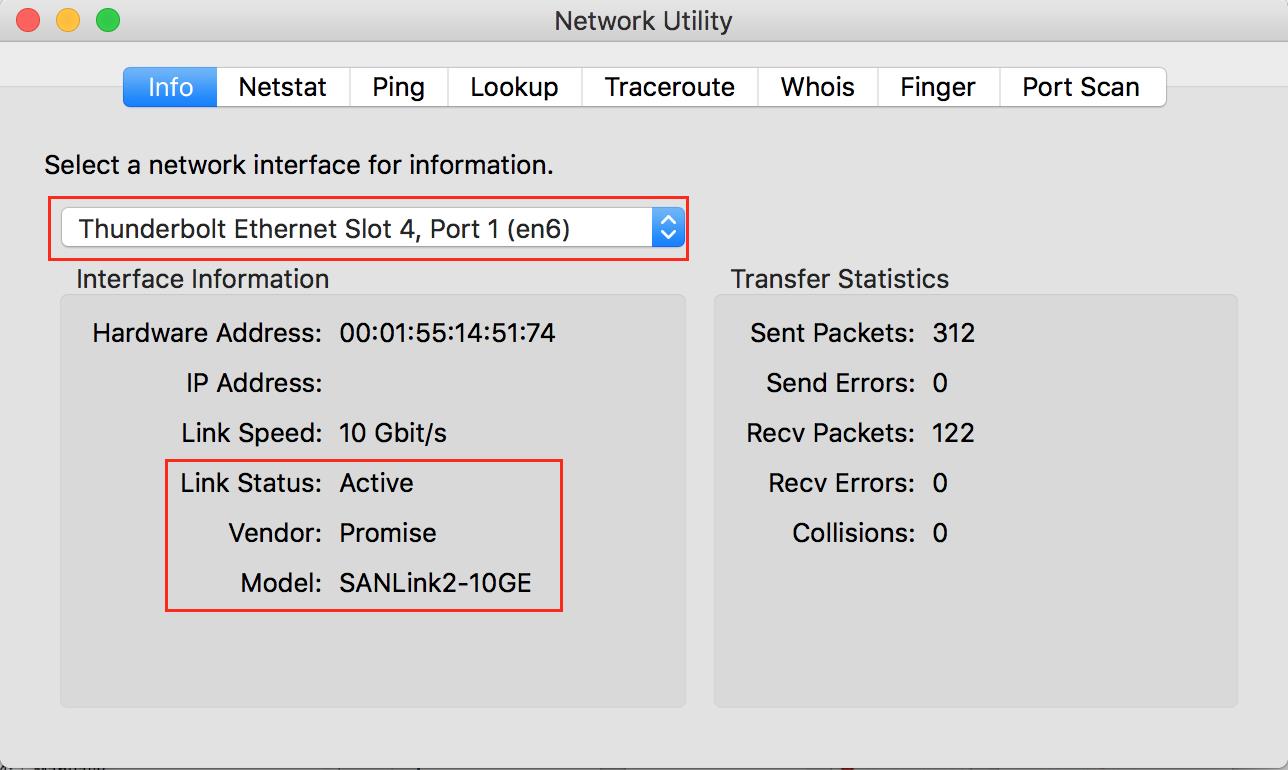
[SANLink2]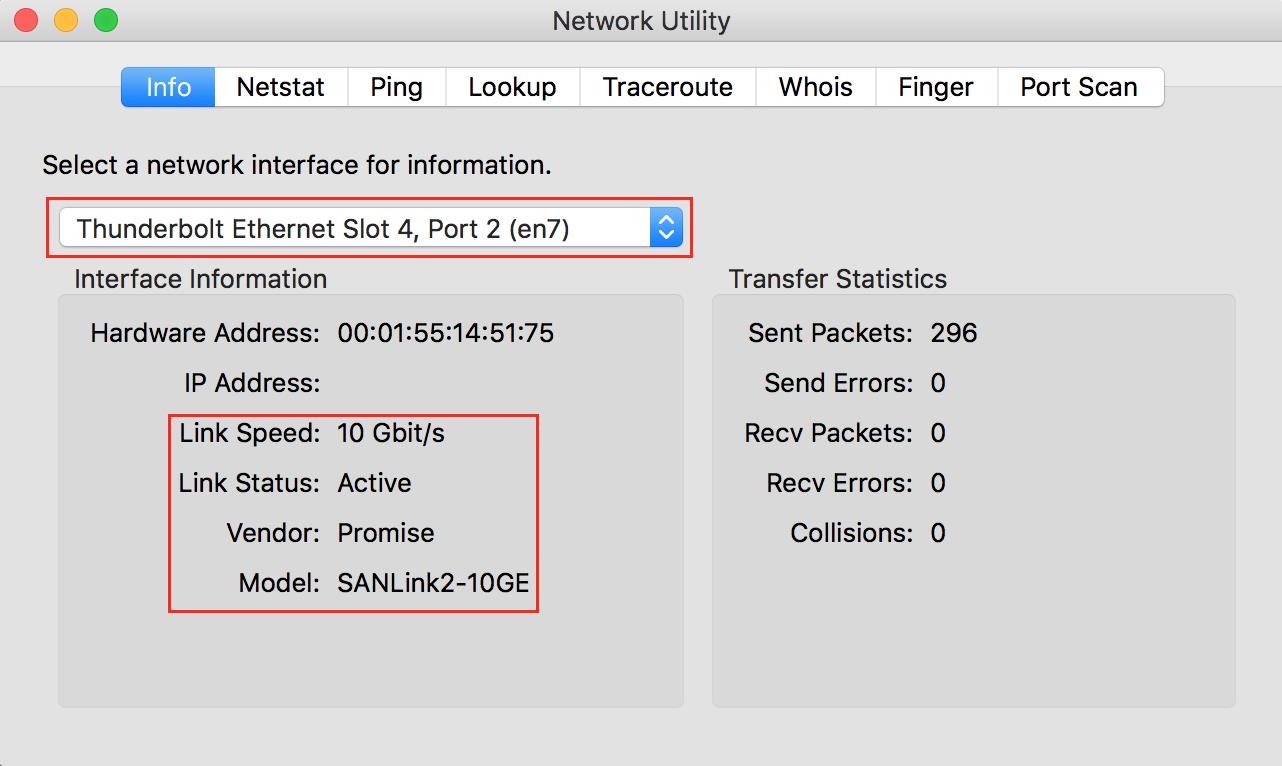
[SANLink3 T1]
(Please note that the SL3 T1 only has [1] 10Gb port)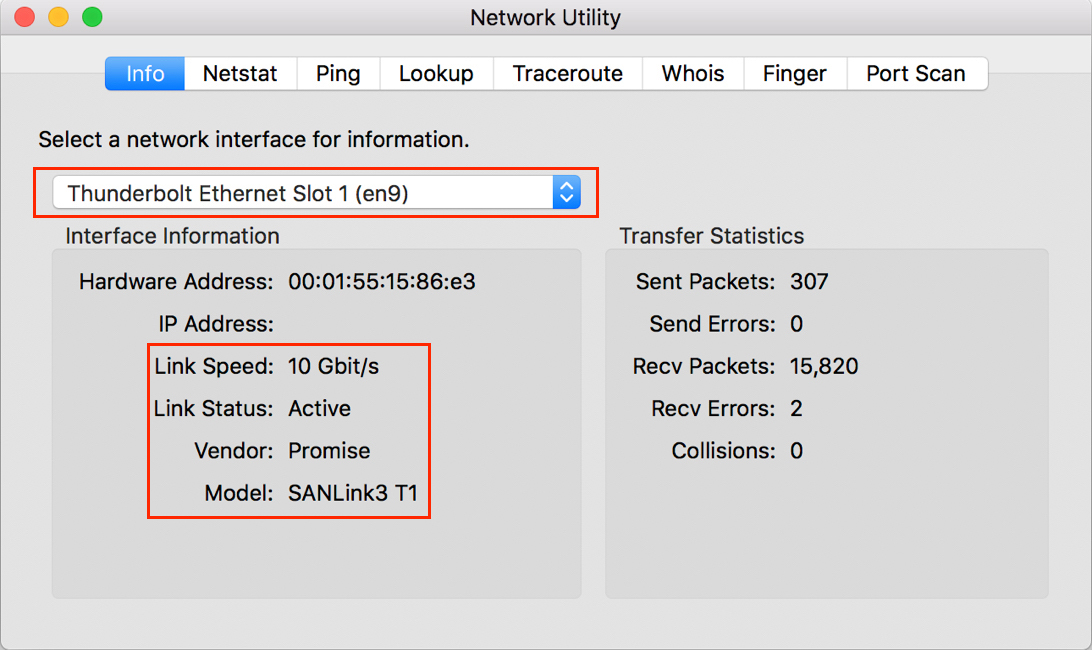
7. Once you've located your SANLink2/3 in Network Interfaces, proceed in setting an IP Address on the desired port.
A. Go to > System Preferences > Network
8. Configure the appropriate IP Address, Subnet Mask, and Router.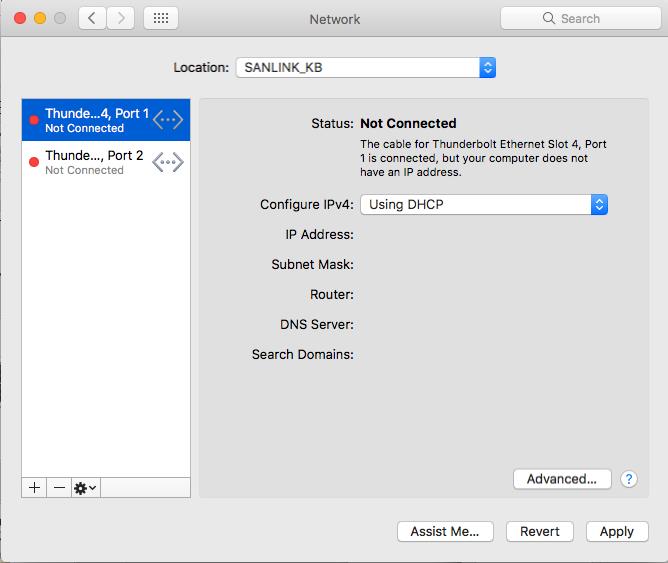
9. Choose how you will be connecting to your network: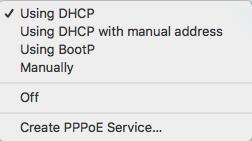
10. For a static IP Address, select Manually and enter the desired IP Address, Subnet Mask and Router: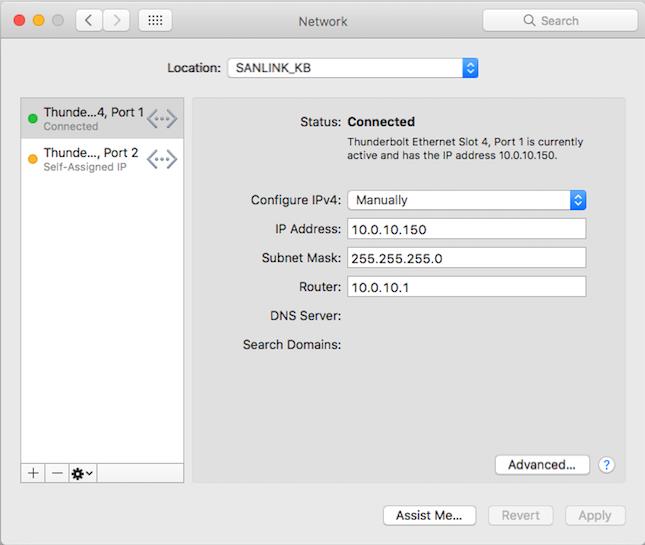
11. For LACP configurations, please visit How to Enable LACP and Jumbo Frames on a SANLink2 10Gb Base-T
II. SANLink3 T1 Windows Info
Windows Drivers and Network Configuration Guide for SL3T1:
A. SANLink3 T1 Windows Driver v4.4.405.154
B. SANLink3 T1 Network Configuration Guide (Windows)
III. Configure NAS Reshare with Pegasus2/3 using SANLink2 or SANLink3 T1
1. Open > System Preferences > Sharing
2. Make sure the service File Sharing is enabled ✔.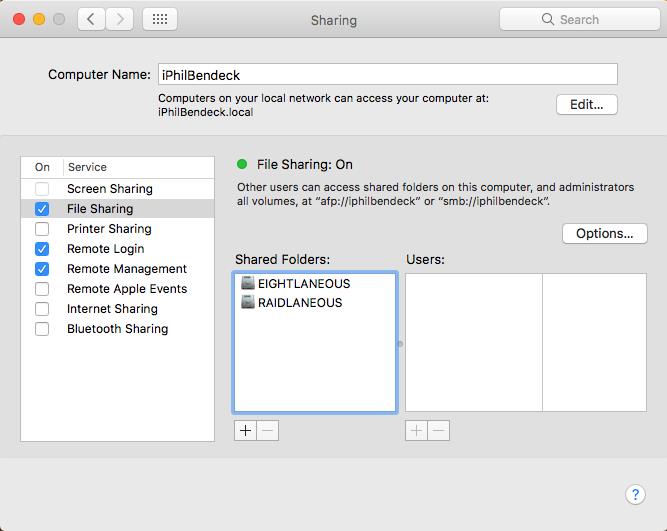
3. Click the + to open sub-Finder window and select your Pegasus volume that you would like to reshare.
A. Then click Add.
(Adding Pegasus Volume "STAGE")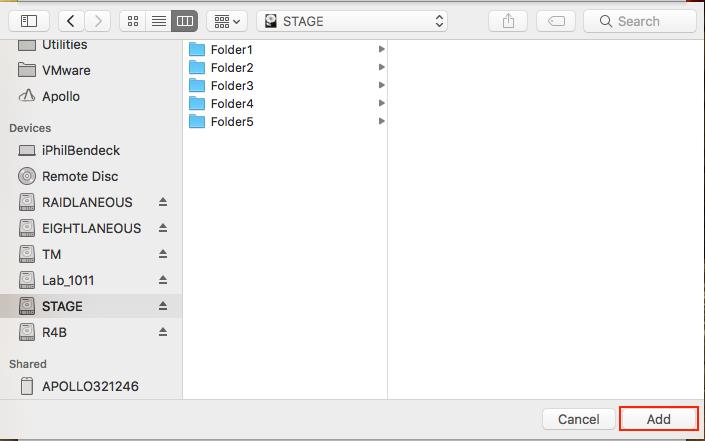
4. You have now added your Pegasus volume as a Network Share (AFP or SMB).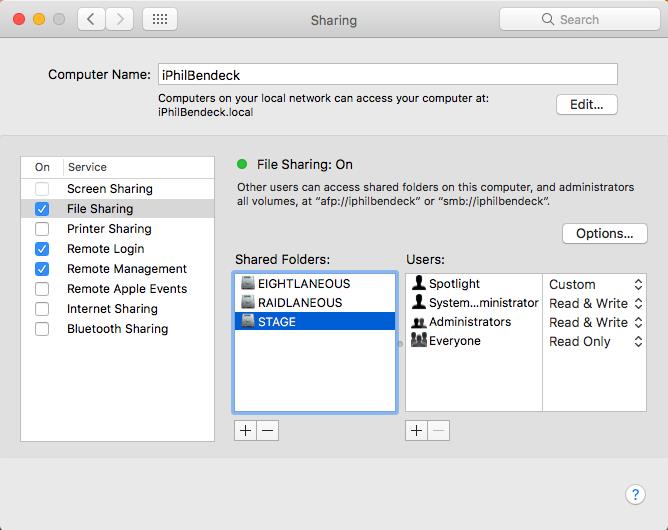
5. For advanced configurable options, please visit Apple's KB Articles:
A. macOS Sierra: Use File Sharing to share files
B. macOS Sierra: Set up a Mac to share files with Windows users
C. macOS Sierra: Set the protocol for file sharing
D. macOS Sierra: Connect to shared computers and file servers on a network
E. macOS Sierra: Set permissions for items on your Mac
F. How to connect with File Sharing on your Mac
IV. Pegasus 2/3 with SANLink2 or SANLink3 T1 Reshare Topology Example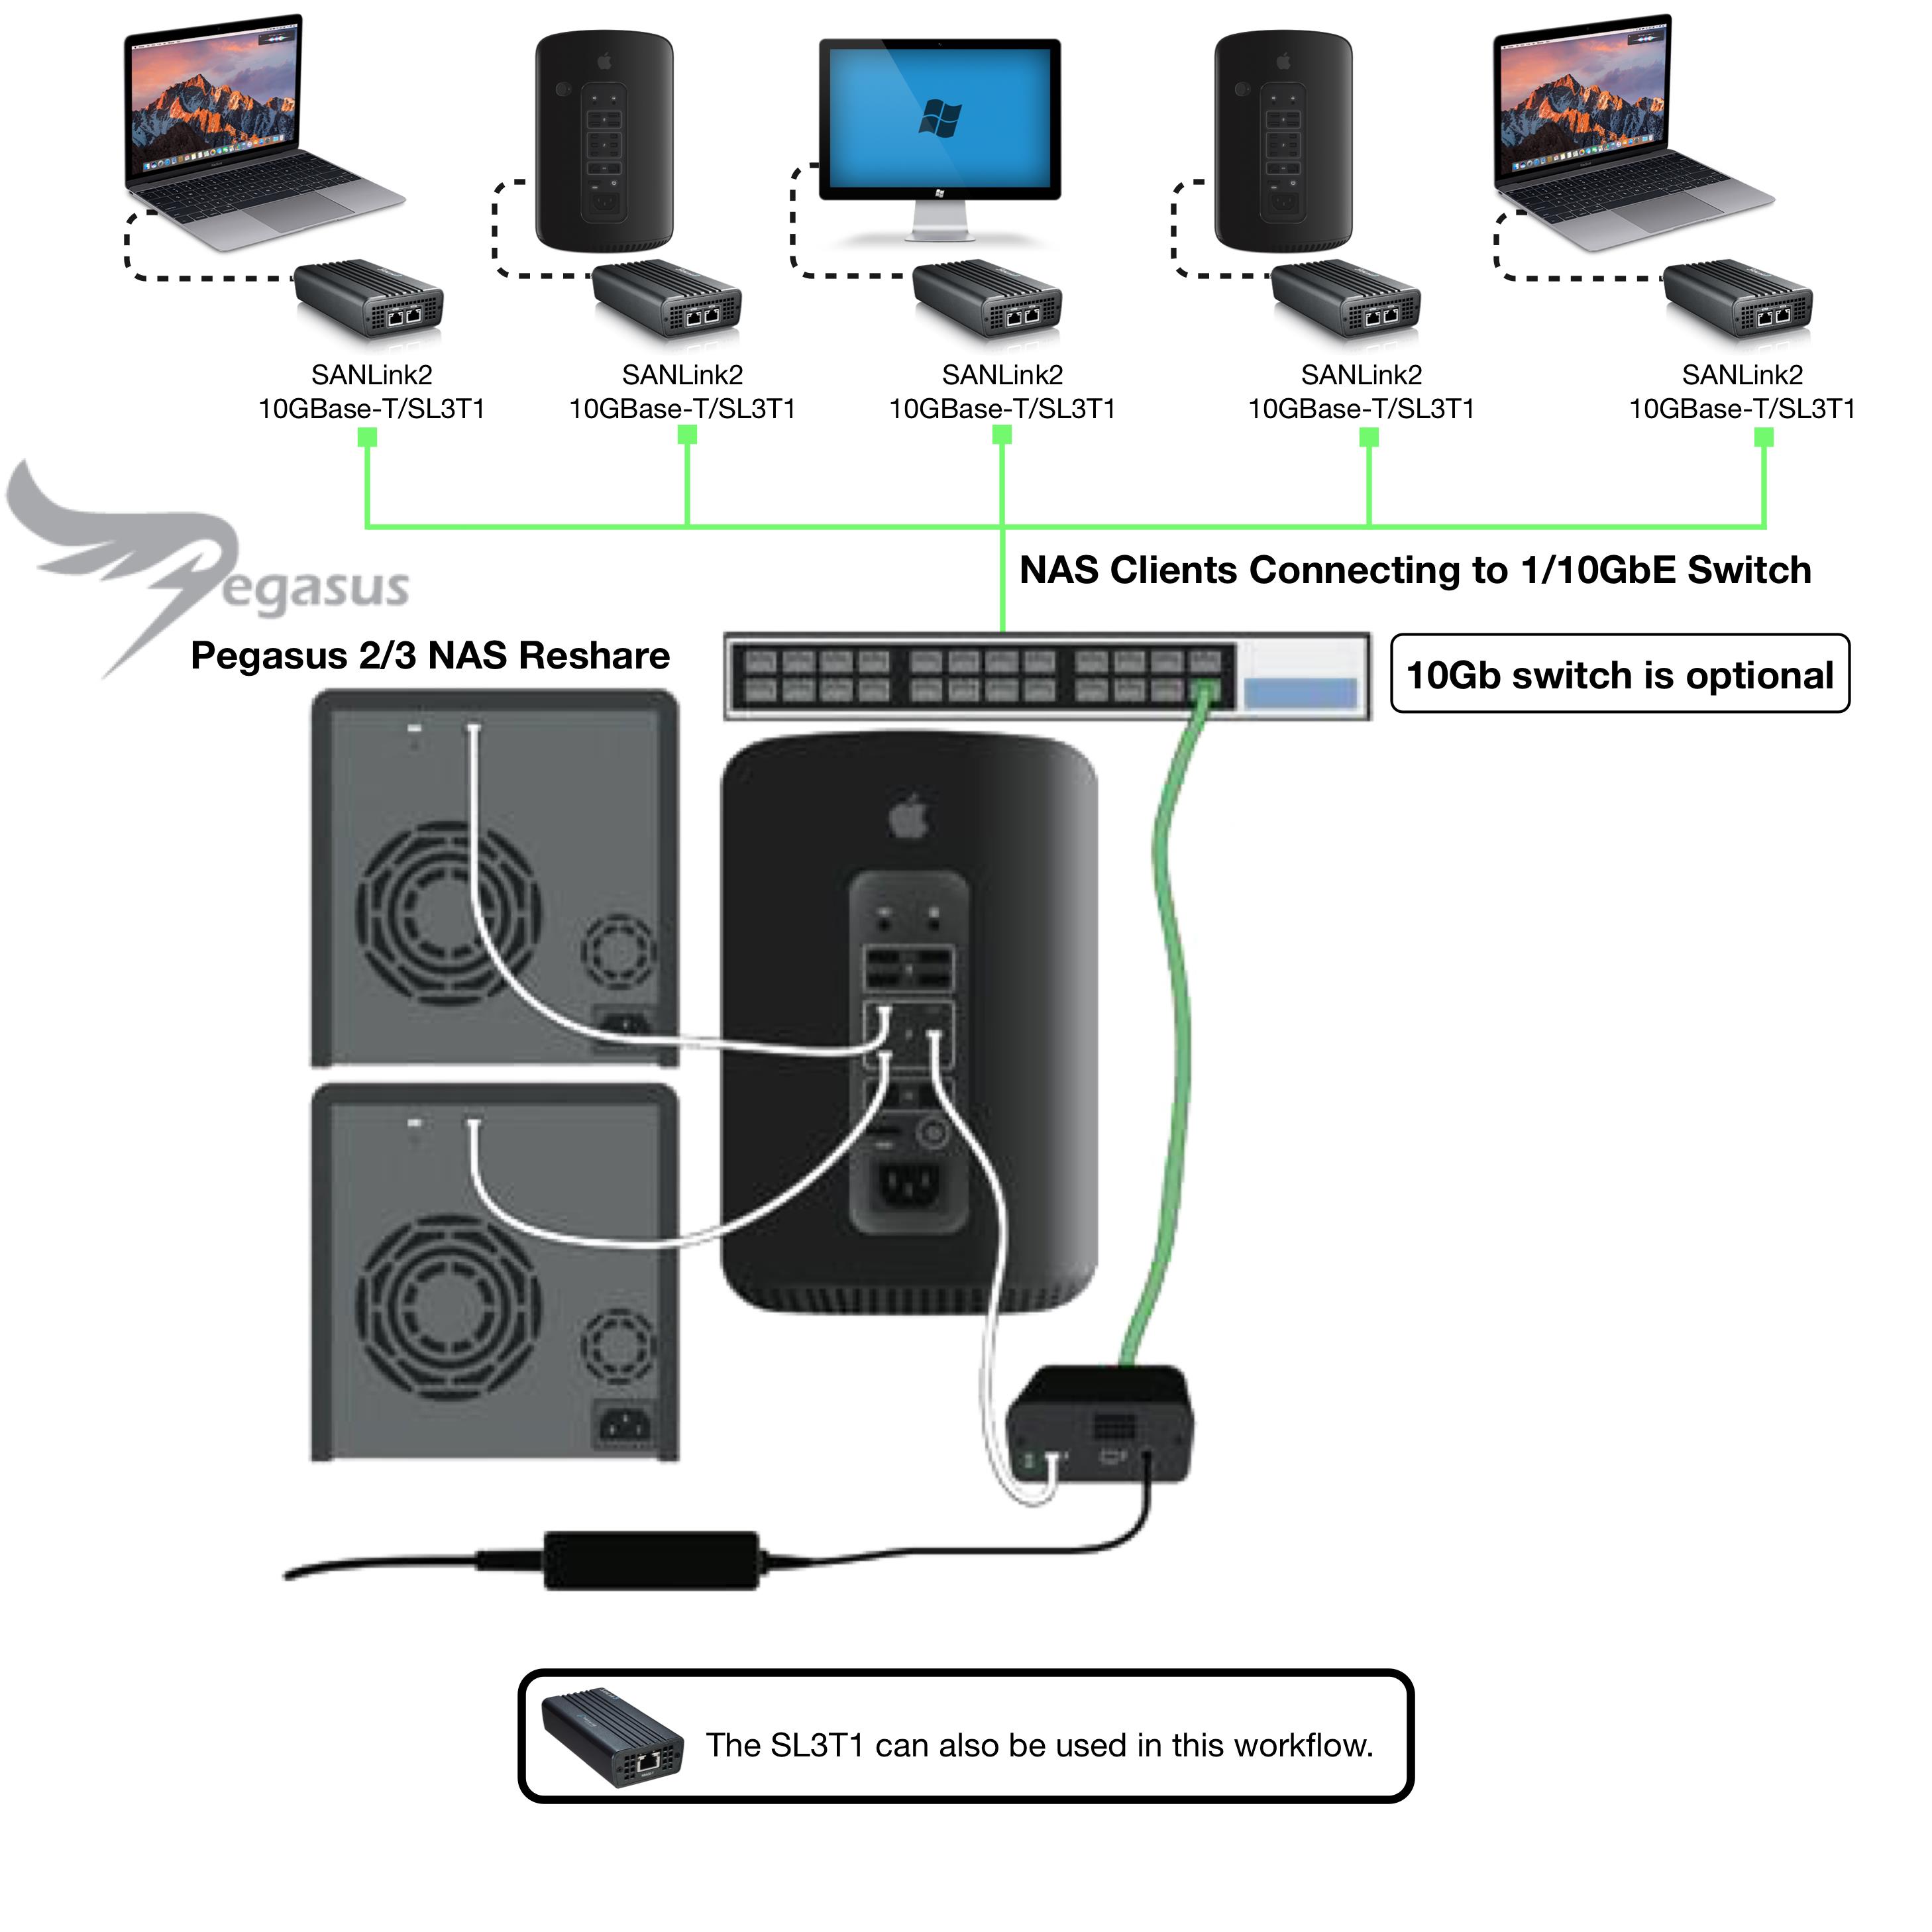
V. Full SAN Topology | FC SANLink2/3 & SL2/SL3T1 NAS Clients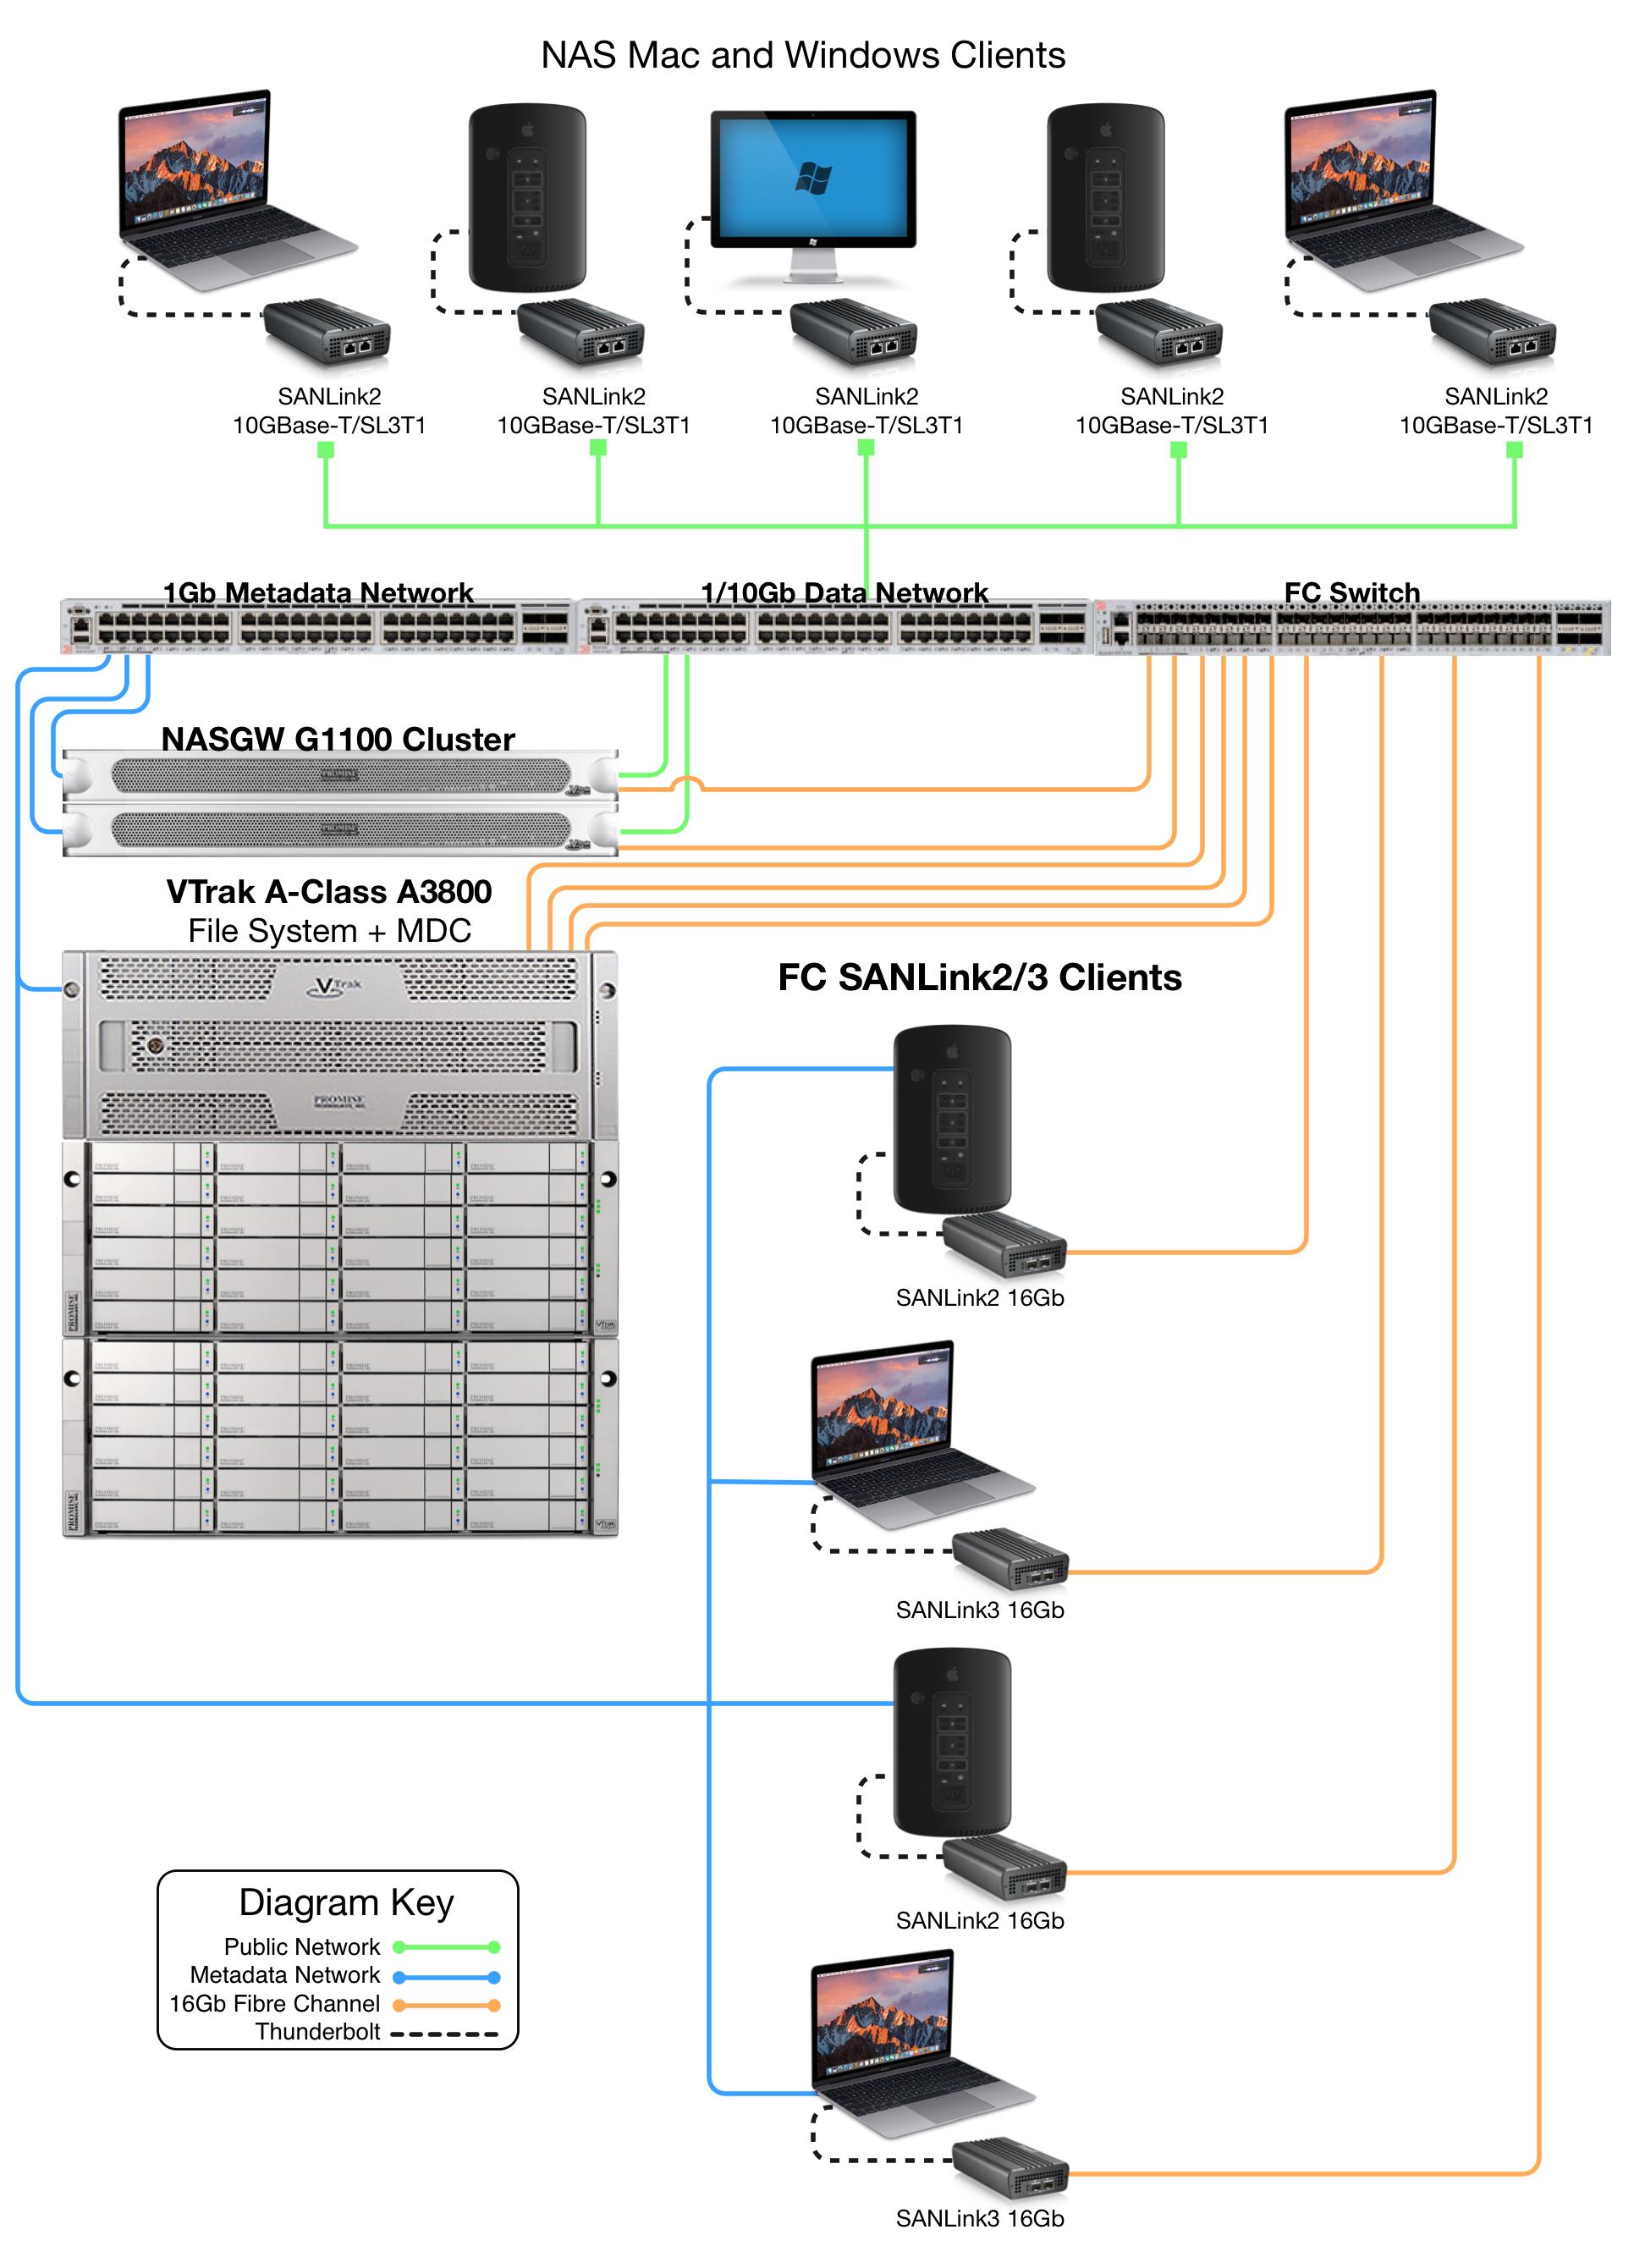
Contact Promise Technology Support
Need more help? Save time by starting your support request online and a technical support agent will be assigned to your case.
Promise Technology Technical Support >

