Replacing a Cache Battery
The cache battery is located inside the cooling unit. The battery assembly is
replaced as an individual part.
Caution
• Try reconditioning the battery before you replace it. See
page 128 or page 183 for more information.
• The battery assembly is replaced as a unit. Do not attempt to
disconnect the battery by itself.
• Installing the wrong replacement battery can result in an
explosion.
• Dispose of used batteries according to the instructions that
accompany the battery.
• While the battery is removed, your system will be vulnerable
to data loss if the power fails while data is being written to the
logical drives.
• If power service has failed, do not remove the cooling unit if
the Controller’s Dirty Cache LED is flashing. See “Browser
Does Not Connect to WebPAM PROe” on page 351.
To replace a cache battery:
1. Verify that the Battery LED is amber or red. See Figure 13.
Figure 13.Fan LED (left: E610f/s, right: E310f/s)

2. Press the release button and pull the handle downward as shown above.
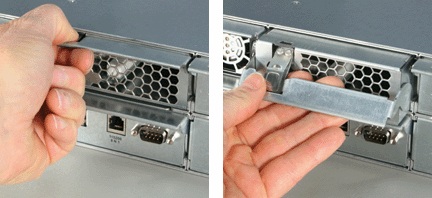
3. Pull the cooling unit out of the VTrak enclosure. See Figure 14 (E610f/s) or
15 (E310f/s).
Figure 14.Removing the cooling unit from the enclosure from the E610f/s
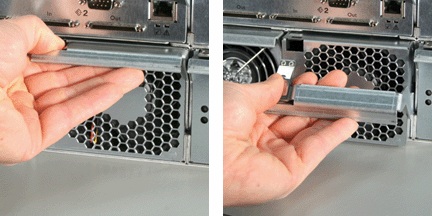
Figure 15.Removing the cooling unit from the enclosure from the E310f/s
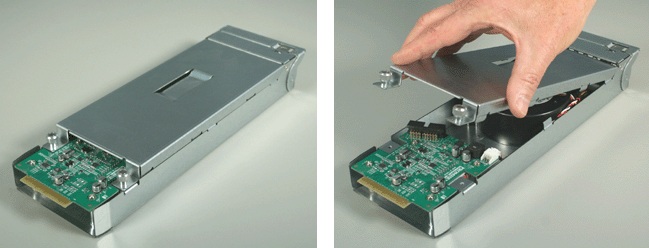
3. Loosen the thumbscrews. A retainer keeps the thumbscrews in place.
4. Grasp the top section near the thumbscrews and lift it off the bottom section.
Separate the cooling unit sections to access the battery assemble. See
Figure 16 (E610f/s) or 17 (E310f/s).
Figure 16.Loosen the thumbscrews and remove the cover (E610f/s)
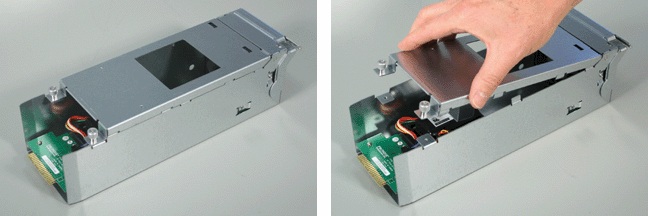
Figure 17.Loosen the thumbscrews and remove the cover (E310f/s
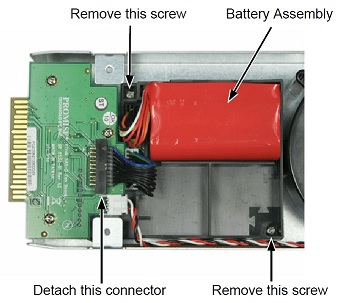
5. Remove the two screws holding the battery assembly in place.
6. Detach the connector on the circuit board.
Do not detach any other connectors. See Figure 18 (E610f/s) or 19
(E310f/s).
Figure 18. Removing the battery assembly (E610f/s)
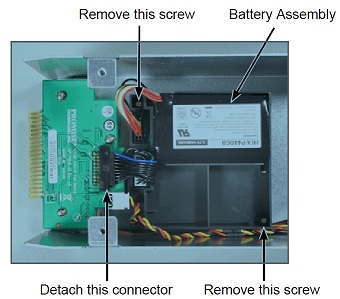
Figure 19. Removing the battery assembly (E310f/s)
7. Lift the battery assembly out of the cooling unit.
8. Place a new battery assembly into the cooling unit.
9. Attach the connector on the circuit board.
10. Install the two screws holding the battery assembly in place to the cooling
unit.
11. Place the top section of the cooling unit onto the bottom section and tighten
the thumbscrews.
12. Carefully slide the cooling unit into the enclosure.
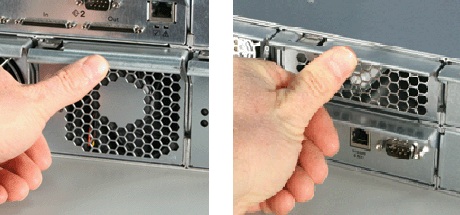
13. Gently press the handle in and upward until it locks. See Figure 20.
Figure 20.Locking the cooling unit handle (left: E610f/s, right: E310f/s
This completes the battery replacement procedure.
Exert from the VTRAK E-Class E610f, E610s, E310f, E310s Product Manual Pages 265-268
This procedure will also work for the VTRAK Mx10 series subsystems.

