Searching: service report - 32 Results Found

Pegasus32 Creating a Service Report from the Pegasus32 Series using Promise Utility
Babatunde Akinkuolie posted this 31 October 2024 - Last edited 31 January 2025

How to Save a Service Report from the Pegasus32 Series using Promise Utility

Prior to calling Promise Technical Support for any Pegasus32 related issues, please capture and prepare the Service Report:

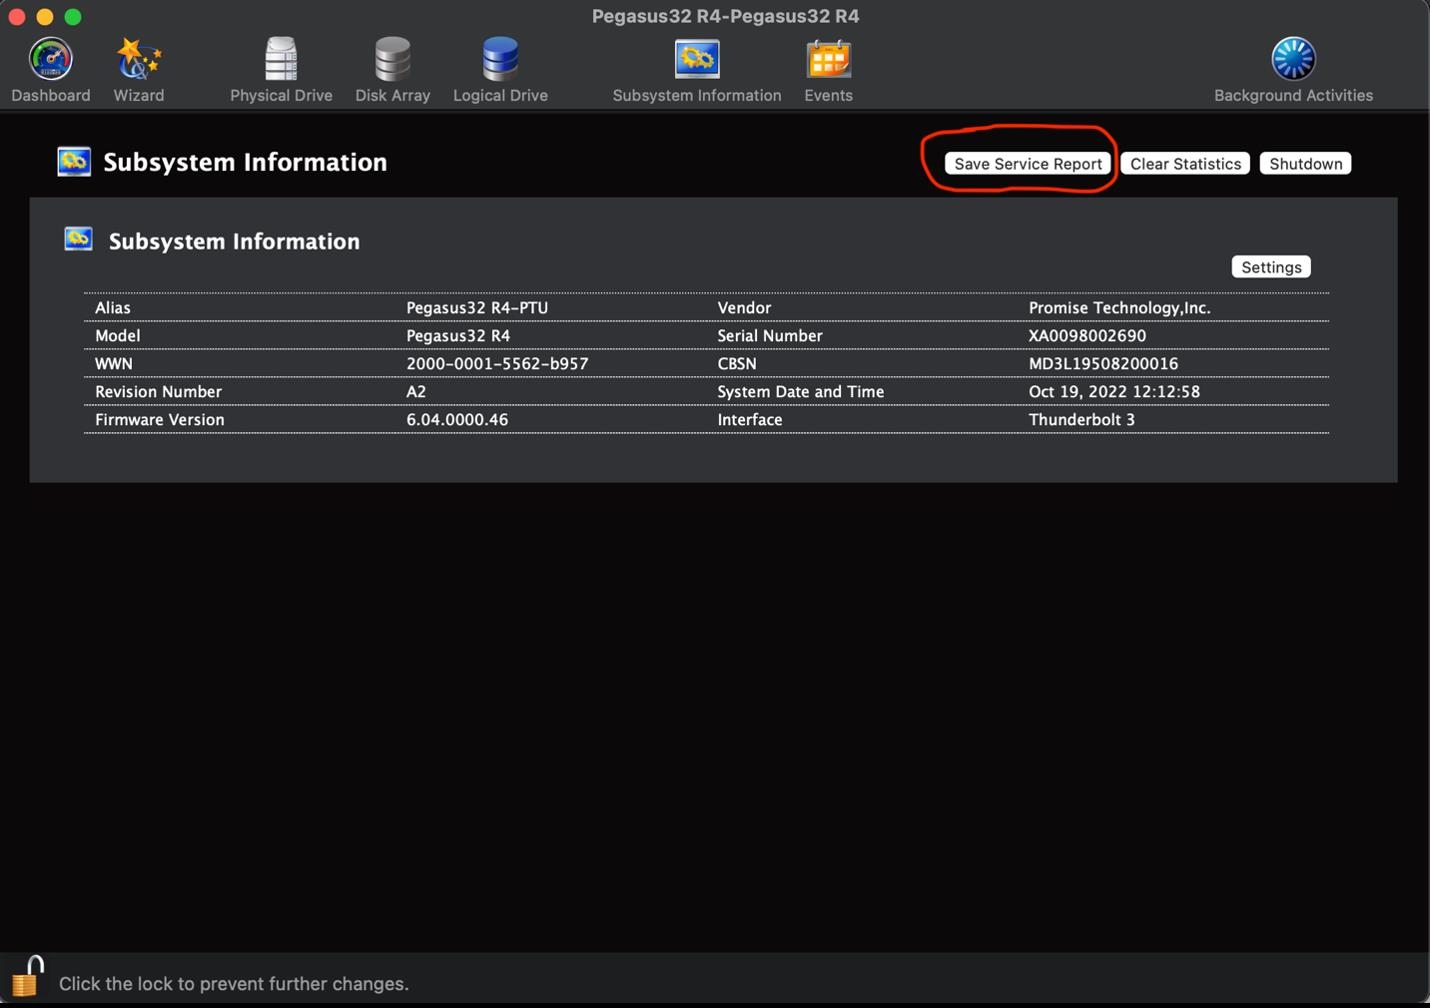
  • Open the Promise Utility,click on Subsystem Information, then unlock the padlock, and then click Save Service Report.

  • If this is successful, then it will open a new window for you to choose a folder to save the report. After that, you may use Finder to see that the file has been created in the folder.

If a Service Report can't be saved for some reason, this is the manual method.

  • Open the Mac OS Terminal session: In Finder, go to Applications, then open Utilities, then open Terminal.
  • At the "$" prompt, type 
  • promiseutil

    and press Enter. If Promise Utility Pro is installed, this command will change the prompt to

    cliib> 
  • At the cliib> prompt, type each of the following commands on their own line, pressing Enter after each one:

subsys -v

enclosure -v

ctrl -v

phydrv

phydrv -v

array -v

logdrv -v

checktable -l 0

event

event -l nvram


Once that is done, then in the Applications folder, open TextEdit, and from File select New Document

Select All from the Terminal window and Copy the entire terminal session to your clipboard; then, Paste it into the TextEdit document. Finally, Save the TextEdit document as a "Rich Text File" with the name servicereport.

These logs are vital in assisting Technical Support for resolution of any issues.

This links to a Promise KB article on how to attach files to a web support case:

http://kb.promise.com/thread/how-to-attach-files-to-your-web-case/

VTrak D5000 How to save the Service Report in VTrak D5000 Series
Babatunde Akinkuolie posted this 30 October 2024 - Last edited 30 October 2024

In most troubleshooting scenarios, Promise Support will require a Service Report to diagnose issues. This report includes event logs, configuration details, and the status of all hardware components.

You can save the report using two methods:

Option 1: Saving from the Home Page

1. Log in to the unit's web interface.
2. Click the Download icon in the top-right corner to generate the report.

- The report will be saved as a compressed .zip folder.

- You can then unzip the folder to view the generated report.

Note: Generating the report may take a few minutes, depending on the size of the array configuration.

Option 2: Saving from the Administration Tab

1. Log in to the unit's web interface and go to the Administration tab.
2. Select the Import/Export tab.
3. Click on Export.
4. In the export options, choose Service Report.
5. Click Submit to start saving the file.
6. A progress bar will show the status of the export request.
7. The Service Report will be saved as a compressed .zip folder.


Close