
How to set up a serial connection to a VTrak and collect all logs using the command line interface
You may encounter a situation where you need to collect information from a VTrak system for troubleshooting, and network access to the VTrak may be unavailable. The VTrak product line controllers have embedded serial data connection to allow access to the system’s Command Line Interface.
Each VTrak system includes two RJ11-to-DB9F cables in the Accessories box. These cables are used to establish a connection between the VTrak and any computer (PC, Mac, Linux) that has an embedded serial port or can use a USB-to-Serial adapter.
Promise RJ11-to-DB9F Cable

Note that you will need to have a terminal emulation application on your computer, or be familiar with any system tools that will allow you to access the serial port.
Serial Pinout
If you would like to build your own cable, follow the pinout diagram below: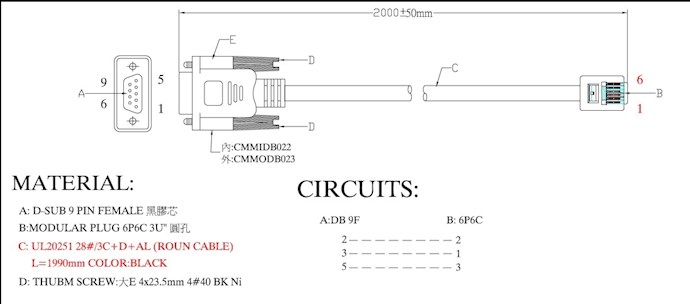
Setting up a serial cable connection
First, plug the RJ11 end of the serial data cable in to the RJ11 serial connector on the left VTrak RAID controller.
VTrak system rear view - RJ11 serial connectors

Then, plug the DB9F end of the serial data cable in to either a computer serial port or a USB-Serial adapter.
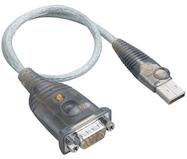
USB-Serial Adapter
Computer Serial Port

Setting up a Terminal Emulator connection
To establish a serial connection between the computer and the VTrak, you have to use a Terminal emulation application. You have to determine which ‘COM’ port is being used by the serial port, and configure that port in the terminal application using the following serial protocol settings.
Press the Enter or Return key and you should see a login prompt in the terminal application. Use your login name and password to gain access. You should see the CLI prompt where you will enter the necessary commands:
administrator@cli
Collecting the log data
If the Terminal application has the ability to capture the session, enabling the logging to a file. Otherwise, you can copy the output from the Terminal and paste it in to a text file.
Below is a list of commands used to view the various configuration parameters and event logs of a VTrak system.
Once you have logged in, type each command separately and hit Enter between each command.
subsys -v
ctrl -v
enclosure -v
battery -v
net -v
bga
fc -v
fc -a list -t device
fc -a list -t initiator
phydrv
phydrv -v
array
array -v
logdrv
logdrv -v
lunmap
event
event -l nvram
Please note that the last command contains a lowercase L(l) and not the number one (1).
Once you have completed issuing all of these commands, Close and Save the Terminal session, or copy all of the session and paste it in to a text document.
This file will be required by the Promise Technical Support team if you have opened a support case.
Contact Promise Technology Support
Need more help? Save time by starting your support request online and a technical support agent will be assigned to your case.
Promise Technology Technical Support >

